Sunday, May 23, 2010

Boat shuttles 2

In the last post I showed you how to wind a pirn and in the images I showed you winding a cardboard pirn, which come in two types, dimpled and smooth.  I showed you an image of two shuttles with the front one having a dimples pirn and when I showed you how to wind your shuttle I showed a smooth pirn.

Here I'm going to show you how I make paper pirns if I run out of cardboard ones!


I take an A4 sheet of paper and cut or tear it in half.  I don't worry about the quality of paper, here I used an old technical sheet I use for my woven samples.

Fold the half sheet and cut or tear that in half.  So you now have 4 quarters.

On the top right hand side of the photograph in the right you can see that I've folded one quarter diagonally in half.   Cut or tear along this fold.


You now have 8 right angle triangles of paper.  Here are just two.


Take the narrow point of the triangle and wind it round your pirn winder.


Once your feel it's securely on the pirn winder, trap your yarn in between the layers of paper, turning the handle so that the paper continues to wind round the pirn winder with the yarn firmly trapped.


Build up your mounds of yarn at either end, then fill the middle as in the previous post.

Maggie Stearn shows another method of making paper pirns on her blog, click here to see it.


Another pirn you may come across is a wooden one, as in this picture.


With these pirns, it's not so critical to build up the mounds at either end, because of the wood stoppers at the ends.

However, when you are level with the top of the stoppers, you must ensure that you begin to build up the yarn towards the middle.  Really for safety, stop winding when your yarn gets level with the end stoppers.


In the next post I'll give you a few tips the ensure that you are doing all that is necessary to prevent those nasty "nose dives"!

Boat Shuttles

There as been talk, recently, on one of the groups I belong to, about boat shuttle and how to throw them without them "nose diving" to the floor!  I was winding my own pirns for my boat shuttle when I realised why some people, usually beginners, have problems with their shuttles, so here I'm going to show you how to wind your bobbins.

It doesn't matter whether you have cardboard pirns, seen here at the front of the two shuttles


Or if you make your own paper ones, I'll show you how I do it in a later post!


First of all build up a small mound of yarn at one end of your pirn.


Now move your yarn across the pirn to the other end and build up another mound.


Next, fill the space between the two mounds with yarn moving backwards and forwards across the pirn so that it fills evenly.


Continue filling the centre of your pirn until it the mounds are level.  Once you get to that stage you can continue filling the pirn, but don't allow the yarn to go over the mounds towards the ends.  If this happens your yarn will jam when you throw your shuttle and may snag your selvedge, pulling it in!

Monday, May 17, 2010

Stretching Yourself!

I've got another student working with me, Darren Kelly from Stoke on Trent.  He's at the University there and is studying Craft.  A few weeks ago he sent me his CV, some images and asked if he could have a summer work placement.  I took one look at his work and rang him immediately, as his work is wonderful, clean and colourful, which is just the style I like.   To cut a long story short he came last Tuesday for his first day.

I had suggested that he worked on a screen to showcase my linen transparent fabric and he arrived with a sketchbook with several ideas and he'd take a lot of time over them, including the detail of how they would be finished.  He is really keen on detail, which elevates a piece of work from the ordinary to the bespoke.

For my part, I want to stretch myself, and as a lot of you know I love colour, so I've chosen cream/beige as my colour scheme and, I don't know why, but the female nude as my inspiration!  Here's one of my initial sketches:

I'm thinking of paring down the design and using Theo Moorman, cream on cream.  But have lots of design work to go before I start on the swatches!

Have you stretched yourself recently?

Alison

Sunday, May 16, 2010

Ravelry Rigid Heddle Weavers Week-end in Flitwick

I've finally managed to download the photographs I took at the Ravelry UK Weavers Rigid Heddle Week-end that was helt at Flitwick on the 8 and 9 May.

The week-end had been organised by Janet Ellison and she had worked so hard that it had been fully booked well in advance and she had already thought about a second week-end before we even started the first!

It had been billed as a beginners week-end, with "trouble shooting" for those who could already weave.  14 lovely ladies had booked on the course and soaked up all the information that I could give them!

Here is Jan, our wonderful organiser, weaving "pick and pick", in other words, weaving one pick or weft thread in one colour and the next in different colour.

Jan is very modest, her work, whether knitting or weaving, is so beautiful, neat selvedges, beautiful colours and sett.


The hall at Flitwick was huge and very light, as you can see.  I've never seen so many women, so quite!  Everyone was getting on with their work, totally engrossed in weaving.


Brenda had borrowed a loom and  had been given suitable yarn from her local guild.  Her first attempt had been excellent.  Beautiful straight selvedges, although the yarn had been a tad too thick for the heddle on the loom.  She had so enjoyed the processes, though, that she purchased a loom and can be seen, here, weaving a beautiful pink and grey alpaca scarf.


There had been a range of rigid heddle looms,  Ashfords, both the Knitters Loom and the rigid heddle, Kromski's, old Dyrads and Becks brought a beautiful little "two way" loom she had got from Ebay.  It was lovely to see her weaving her own handspun on this little loom and here is the result.


A range of skills were learnt, and on the left  you can see Elaine knotting her ends against the fell of the cloth (where the last pick, or weft thread, meets the bare warp ends, or threads).  She used some lovely textured yarns which gave the impression of a beautiful bluebell wood!

You can see three blue stripes in the scarf where Elaine had a really good go at chaining.


Here, Beth is working a hand manipulated technique called Brookes Bouquet.   In this technique, groups of warp ends are wrapped with the weft yarn and anchored with a half hitch.

Beth's little scarf had slit woven at one end so that it would sit snuggly round the neck.  She had used a lovely harmonious range of textured yarns.


After taking the scarves off the loom, they were all checked for skips and then mended before washing.

Chelle can be seen mending her vibrant scarf on the left.  Mending is a really important skill, knowing whether to mend the warp or the weft and where to cut the mended thread.  She can be seen mending warp skips with a new weft thread.


The group were shown two methods of finishing ends on their scarves, knotting and hemming.  Jill can be seen hemming the beginning of her second scarf.  She used a range of yarns including eyelash yarn and fancy tape yarns.


There were two sets of Mothers and Daughters.  Jill shows her textile training, here with her eye for colour and texture.   Her daughter Ellen had been booked on the course by Jill, who knew she would love weaving and she was right.  Ellen took to it like a duck to water and her second scarf can be seen below!


Ellen can be seen here using her Mum's Kromski loom and weaving her Mum's hand spun yarn as the weft of her second scarf.


When Jan had first advertised the course, way back in January, Emma had been so excited and had emailed me to order a rigid heddle loom.

She can be seen on the left almost at the end of her first scarf in green and blue.  Her selvedges were so neat and I can't wait to see her "finished" scarf.


Jaq had quickly woven her first scarf, she wasn't a complete beginner, having woven one piece previously, and re-warped her loom with her own hand spun yarn.

To show off her yarn she had chosen a wide sett and wove her weft with a "crammed and spaced" effect.  It was really lovely and can be seen below.


Here is a close up of Jaq's hand spun and hand woven "crammed and spaced" scarf.


The other Mother and Daughter duo where Lynda and Becky.

Becky used the "meet and separate" technique in her second scarf of wool and linen from Louet.    I'd heard about this yarn, but never seen it and was very impressed with it.


Here is Lynda, showing off her "finished" wool and linen scarf.  Notice how good her selvedges are!


Jill is picking up groups of warp ends to enable her to make a different patterns or inlay thicker yarns.


Catherine had already done some weaving before and has a 4 shaft table loom.  She had never done any rigid heddle weaving before.  She rose to the challenge really well, producing two beautiful scarves.  Her second had some lovely texture in the warp and enhanced that at either end with chaining.

You can see the "till roll" used to determine the length of the weaving, placement of detail and slits that Catherine used.


I had a really enjoyable time, tutoring this workshop, and was amazed how far some of the students had travelled.  Eastbourne, Manchester, Southampton and Bridgenorth were but a few of the places they had travelled from.

By the time the week-end was finished, nine people had booked on the 2nd course in October, but by the middle of the following week it was fully booked!  Well done Jan and thanks for asking me to tutor the workshops.  I find it so rewarding when I'm allowed to pour out my knowledge to such responsive people.

Thursday, May 06, 2010

Sustainability

I've just finished quite a busy few weeks looking at sustainability.

It began with the Rebecca Early lecture and workshop at Nottingham Trent University.  Becky has been doing a lot of research into sustainability and with a group of lecturers at the Chelsea College of Art and Design set up TEDResearch.  Please take a look at Rebecca's website and at the TED website which has some interesting and very useful resources and while you're there don't forget to sign up for their newsletter!

Last week saw me at NTU again, for the Private view of Akihiko Izukura's exhibtion, Life in Colours.  Running alongside the exhibition has been a set of four workshops which explore Mr Izukura's philosophy of natural textiles, Spinning, Reeling, Dyeing and Weaving and Braiding.

The exhibition is a revelation and a profusion of colour!  Who said natural dyeing was boring!   If you've in the Nottingham area is really is worth tracking down the exhibition at NTU's Bonington Gallery, your won't be disappointed unless you hate colour!  If weaving is your thing, you won't help being amazed at the skill of his weaving of traditional sashes, Obi, or his skill in braiding which is manipulated to fit the body.

The morning following the Private View I attended a Spinning workshop with Mr Izukura.  It wasn't what I'd call spinning, but was very interesting, never the less.  We had six silk worm cocoons that had been de-gummed and which contained two silk worms.  These "double" cocoons are not good for reeling as the two silk worms in the one cocoon cause the silk filament to tangle.  We pulled the softened cocoons into rectangles then moulded them over balloons and plastic to form 3D shapes, which were then painted with rice paste to stiffen then when the paste dried.

The afternoon was followed with the Natural Dye workshop, which for me was so wonderfully refreshing and completely different to any natural dyeing that I do.  I chose to dye a silk scarf which had been woven in Mr Izukura's factory in Kyoto, Japan.  The warp was spun silk and the weft was noil silk and took the dyes beautifully.  

I wetted my scarf, pleated it diagonally, forming a small triangle which I then pleated across the triangle and tied with two elastic bands.  I dipped one end in logwood, the other in cochineal, the top of the centre in walnut and the bottom centre in clove.

To fix the dyes I dipped the whole scarf in Camillia Ash water, then dipped the ends in fermented iron water.  This picture really doesn't do the colours justice.  What was amazing in this workshop was that we didn't use any heat and the dipped very quickly!

I was back again this week for a Reeling Workshop, where we reeled six cocoons into 3D shapes over balloons and plastic cylinders.  Very similar to the Spinning workshop, but using the filament silk rather than the noil.   We spent the afternoon weaving and braiding naturally dyed paper yarn into an interesting "neck piece".

My whole practice has been questioned by these events, how can I make my practice more sustainable and how do I take on board Mr Izukura's philosophy, putting nature before ego and practice!

So much food for thought.

Monday, March 29, 2010

Make your own Fabrics!


Have you ever wondered how wonderful it would be to make your own fabrics, whether for suitings, skirts or for cushions, for example?

Do you think you need a huge loom that would fill your dining room?  Do you think that all you can weave on a simple loom is scarves and table runners?

Well you might be pleasantly surprised!  Most of the introductory courses I teach are on simple and affordable looms that not only allow you to weave scarves, but beautiful fabrics that can be used to make clothes.

If you attended one of the courses I run for Skylark Holiday, for example, such as the Introduction to Weaving course you would:

  • Learn to warp a loom.
  • Weave a scarf.
  • Learn how to plan a warp for fabric for a chosen project.
  • Weave a piece of fabric for a cushion cover or small article of your choice.
  • Finish your fabric to that it can be cut and sewn.
  • Finish the ends of your scarf without knotting.
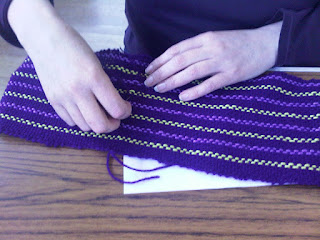
Hear I am (on the left) wearing a suit made of hand woven fabric.  The swatches for this suit were woven on a simple rigid heddle loom.


Bibi (on the right) is weaving her hand woven scarf.   She designed the fabric herself and it was woven on a rigid heddle loom.  It could be cut and sewn to make a skirt, for example. 

So you see, it's not so difficult!


Sunday, March 28, 2010

Workshops and Courses for 2010

Here is a list of the workshops and courses I will be tutoring in 2010:

Saturday 15 May - Creative Spinning - Abergele Guild of Weavers Spinners and Dyers.
Sunday 17 to Friday 21 May - Beginners Spinning - New Bath Hotel - for Skylark Holidays.
Monday 7 to Friday 22 June - Natural Dyeing - Standlow Farm - for Skylark Holidays.
Saturday 19 to Sunday 20 June - Creative Spinning - New Bath Hotel - for Skylark Holidays.
Saturday 3 to Sunday 4 July - Start to Weave with a Rigid Heddle Loom - New Bath Hotel - for Skylark Holidays.
Tuesday 13 to Wednesday 14 - Introduction to Dyeing - Standlow Farm - for Skylark Holidays.
Sunday 25 to Friday 30 July - Learn to Weave with 4 shafts - Venue to be confirmed - for Skylark Holidays.
Sunday 26 September to Friday 1 October - Introduction to Weave Design - New Bath Hotel - for Skylark Holidays.
Sunday 3 to Friday 8 October - Creative Dyeing - Standlow Farm - for Skylark Holidays.
Saturday 16 October - Colour Blending in Spinning - Bradford Guild.
Saturday 23 to Sunday 24 October - Rigid Heddle follow on course - Flitwick - Ravelry Weaving Group.Saturday 30 to Sunday 31 October - Make the most of your Rigid Heddle Loom - New Bath Hotel - for Skylark Holidays.
Saturday 6 to Sunday 7 November - Introduction to Spinning - New Bath Hotel - for Skylark Holidays.
Saturday 20 November to Sunday 21 November - Creative Spinning - York and District Guild.
Saturday 27 November - Colour and Weave - Hallamshire Guild.Colour [ Color]-And-Weave Design Book: A Practical Reference Book

Funky Fancy Yarns Part 2!

Alet has sent use some images of the workshop in her studio in Zeeland, so I've selected a few for you to see the industrious goings on!
There were wheels of every type you could imagine and even some drop spindles
were used!


At both venues we were very well fed!  And the weather was very kind in Zeeland!
All in all we had a wonderful time in the Netherlands, both in the Hague and in Zeeland.  We met old friends and new ones at both venues and have been booked to run two, 3 day workshops next year, with the addition of Helen Melvin to our happy band of tutors.


Funky Fancy Yarns

Here are a selection of fancy yarns produced at the Funky Fancy Yarn Workshop organised at Alet Tienpont's studio, Textielwerk Wol en Zo in Zeeland, Netherlands, last week.

Jane Deane, Amanda Hannaford and I had been invited to tutor two, 2 day workshops in the Netherlands.

The first, organised by Dineke of De Spinners in The Hague included Creative Spinning with Jane, Woollen, Worsted and Cotton with Amanda and Natural Dye Extracts with me!   From the Hague we traveled to Zeeland in the south of the Netherlands where Jane tutored a Silk Workshop, Amanda Woollen, Worsted and Cotton again, while I tutored the Funky Fancy Yarn Workshop for Alet.

We were bowled over by the beautiful yarns produced in all the workshops and I have included just a few of the fancy yarns in this blog!

I hope you are inspired to have a go!

Pure Tinctoria Website

Hi All

I just wanted to update you about the Pure Tinctoria website, which is undergoing changes.  The company, Startershop, I have my e-commerce website with has decided they don't want to manage e-commerce sites anymore, so I am having to look for a new website and host.

I thought I'd found one as good as Startershop, but sadly  they have let me down, in fact, on more than one occasion.  What should have taken less than a week is still ongoing and therefore I am still with the old site, but having taken our an advert in a couple of magazines, to promote my new domain name, some new or potential customers will find that they can't access the new site, which appears as under construction and it feeds them to the wrong old site!

Please bear with me, I'm finding it very, very stressful, but will full fill all orders as speedily as usual.  If you hear of anyone who has tried to access either site and not succeeded, please direct them to my email address or telephone number and I will deal with their order that way in my usual efficient manner!

I hope to get a new site up and running before Wonderwool Wales, but am holding my breathe!

Best wishes

Alison

Tuesday, February 16, 2010

Pay it forward, with some caveats...

I saw this blog post and decided that it would be fun to play - so I'm in! (especially since I have a year to come through).  

Since I've just received an email from Lucy asking for my address, I'm so excited and can't wait to see what comes in the post!  I'll put up an image when it arrives, but in the mean time, here are the rules!:

The first three people to respond to this post will get something made by me! My choice. For you.This offer does have some restrictions and limitations:
1- I make no guarantees that you will like what I make!
2- What I create will be just for you.
3- It’ll be done this year.
4- You have no clue what it’s going to be.
5- I reserve the right to do something extremely strange.

The catch is that you must repost this on your blog and offer the same to the first 3 people who do the same on your blog. The first 3 people to do so and leave a comment telling me they did win a FAB-U-LOUS homemade gift by me! Oh, and be sure to post a picture of what you win when you get it! Who’s in?


If for some reason three people don't comment within a couple of days I'll open it up to people without blogs... but blog-people get first dibs :)

Wednesday, February 10, 2010

Back in the loop!

Hi all

I've not really blogged properly for a few months now, what with selection to exhibit in Paris, the birth of my granddaughter, snow and computer problems!   Anyway, now that all is a bit quieter and I have a new computer I feel I can now start to blog again.

At the beginning of this year I heard that Craft and Design Magazine are running their awards again so up until 30 April you can vote for your favourite designer make.  I'd love it if you would all consider voting for me by following this link:  www.craftmaker.co.uk/alisonyule


Alternatively you could go to the website by clicking on the banner, which will take you to the page that tells you all about the awards and how to vote, then just search for Alison Yule!
craft&design Selected Awards
Publish Post
Many thanks,  Alison

Saturday, January 09, 2010

Weavers Knots

I came across this nice new blog, quite by chance while looking up Universal Tie-up!  How Google thought it was relavant, I don't know, but never the less it's a really useful, but different way to tie a weavers knot!  While you're there take a look at some of Jenny's other posts, too!
http://jennybellairs.blogspot.com/2010/01/fast-pictorial-guide-to-weavers-knot.html

Friday, January 08, 2010

The Textile Blog

This is another really useful blog, full of wonderful history, inspiration and detail:
http://thetextileblog.blogspot.com
It's a really huge resource and again well worth a scroll down to older posts.  The Islamic section has some wonderful patterns.

Wednesday, December 02, 2009

Colour Inspiration

If your looking for colour inspiration, take a look at this beautiful blog: Kris's Color Stipes

Beautiful colour stripes inspired by the bloggers life and fabulous textiles.  Well worth a scroll down the whole page!

Tuesday, November 24, 2009

More Places to buy Pure Tinctoria Extracts

You can buy Pure Tinctoria Dyes from the following places:

Eco-Haberdashery Shop
Unit 1.10 OXO Tower Wharf, facing the river.
Opening hours: 12pm-6pm, Tues-Sat.

Jane Deane
Duchy Square Centre For Creativity
Tavistock Road
Princetown
Devon
PL20 6QF

Tel: 01822 612338

We will be having a stockist in the Netherlands soon, so watch this space!

Thursday, November 19, 2009

Trying a new presentation!

Saturday, November 07, 2009

Selected to exhibit at Maison & Objet

I've been selected to exhibit at L'Espace, part of Maison & Objet, in Paris. Six members of Design Factory have been selected and are being sponsored by Atelier d'Art de France, their version of the Crafts Council, so it's quite an honour. UKTI have also given use some funding, so it will be a great experience and partly paid for.

I can't tell you how excited I am!

Creative Spinning in Kent

Last week end I was invited, by Kent Guild of Spinners, Dyers and Weavers, to tutor a Creative Spinning workshop.

This annual members event runs from 11.15am to 3.30pm so there wasn't a lot of time for them to get their heads round Creative Spinning using an image as a source of inspiration.

Here are a few photographs of what can be achieved in so short a length of time!

Inspiration ranged from photographs of gardens;

Images from gardening magazines;


Images from the front of greetings cards;


And images from other magazines.

All in all the results were spectacular and all the members who took part felt they'd learnt a great deal about new techniques and how to interpret images into beautiful, inspirational yarns.

By the way, I drove down on the Friday evening, so as to be fresh for the start of the workshop, and stayed with Kent Guild member Valerie Selden and her husband John. They run a lovely B & B in the village of Mersham, called Glebe Place and if you're looking for a place to stop on the way to France or to explore Kent then try their hospitality!
Related Posts Plugin for WordPress, Blogger...