Showing posts with label weaving. Show all posts

Sunday, November 08, 2020

New Directions - Part 2 - More of the Design Process.

 I love the design process and can no longer start a project without doing some sort of design, so I was thrilled when I heard that the UK Complex Weavers Group had arranged a design workshop with Laura Thomas.

In the last post I introduced the first steps Laura lead us through and here, in this post, I’ll show you my next steps.


Looking at the images on my mood board the next thing to do was to explore colour, so using my favourite medium of watercolour I looked at stripes in the colours found in the images.  The first stripes are rarely the best so it’s well worth the time taken to paint as many as you can, in your favourite medium until you feel the colours are right, not necessarily exact.


The next obvious think to look at is texture and it was while practicing marks using different tools and studying my images that I realised that the embroidery on the coat was herringbone.  


Using colour and texture and the herringbone idea I then tried out different ways to represent the idea.  

So many people ask me why it worth doing these exercises, but it’s doing them that helps to distill the ideas and I realised that herringbone was definitely the main structure I want to explore for this project and use two different shades of dark blue, one in the warp and one in the weft.


In the next post I’ll be explaining where the design process took me, but in the mean time, sign up for Laura’s newsletter as she will be running this course in the future.

Friday, April 17, 2020

Warping your Rigid Heddle Loom - Starting to Weave

The most common question I'm asked by beginners is how to keep the selvedges neat.  This post is intended to address this problem.

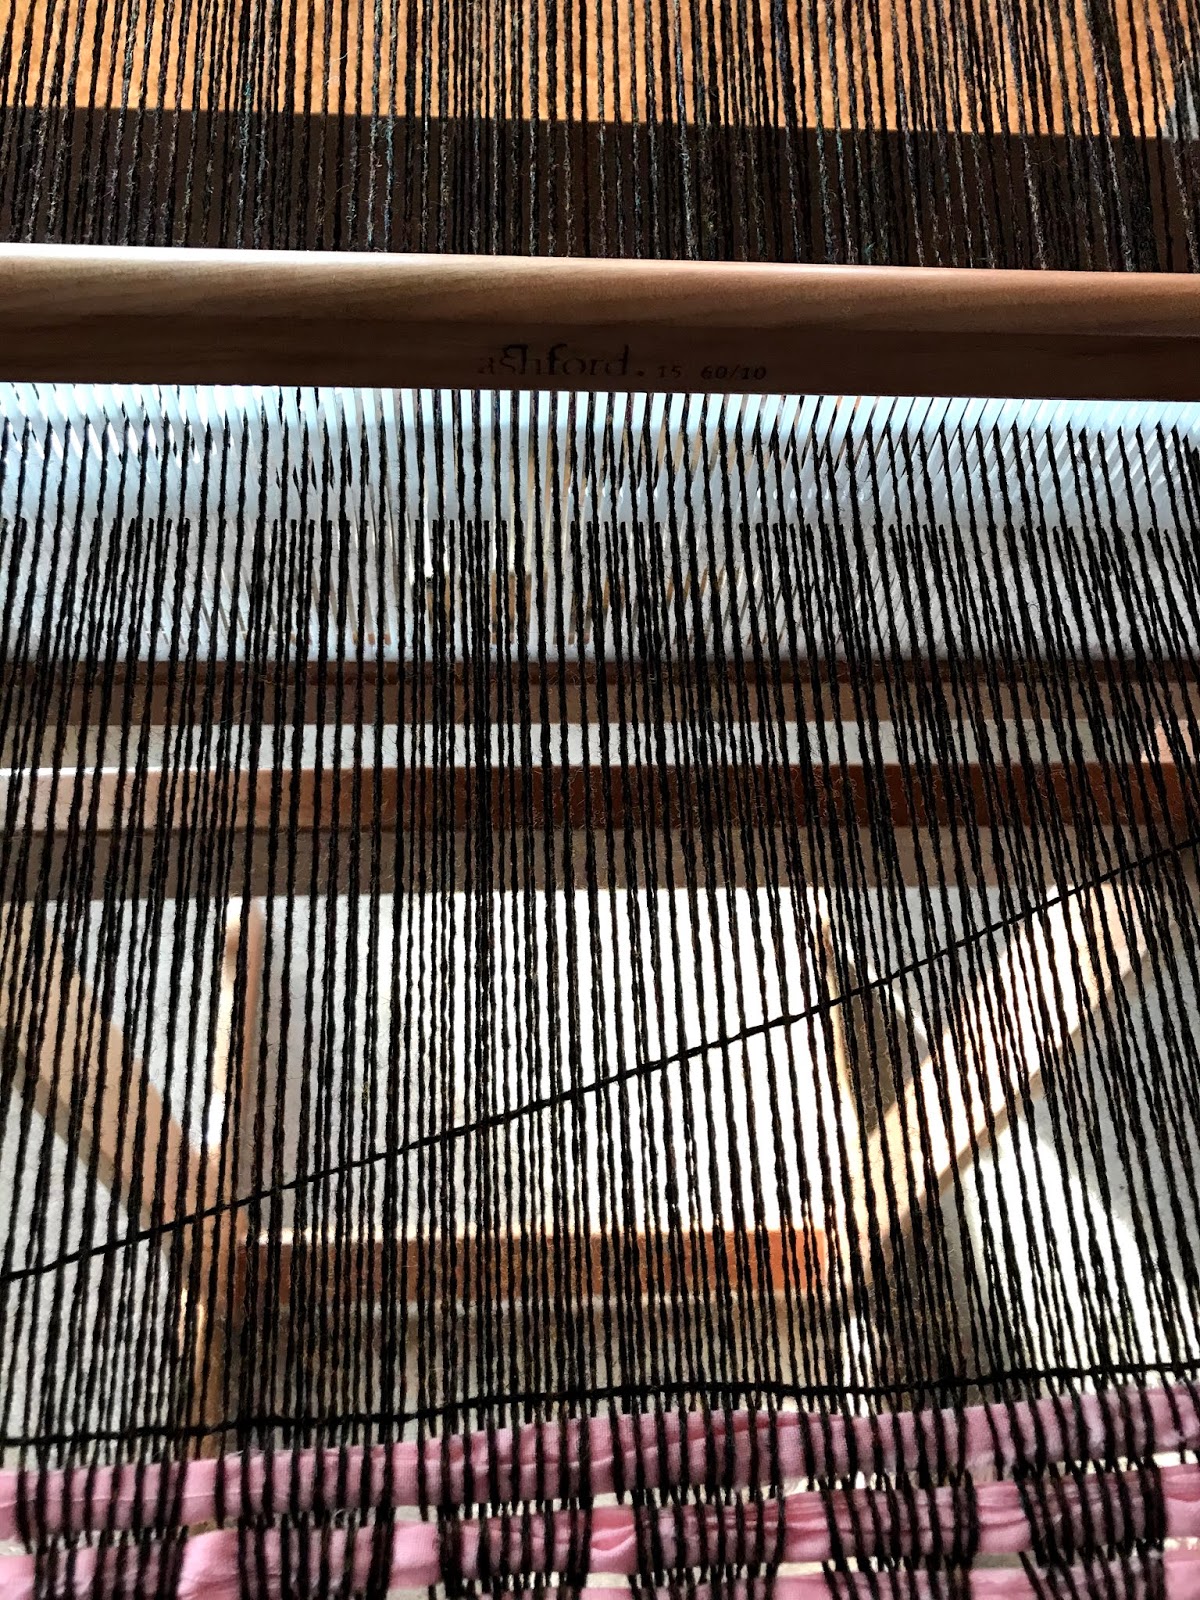
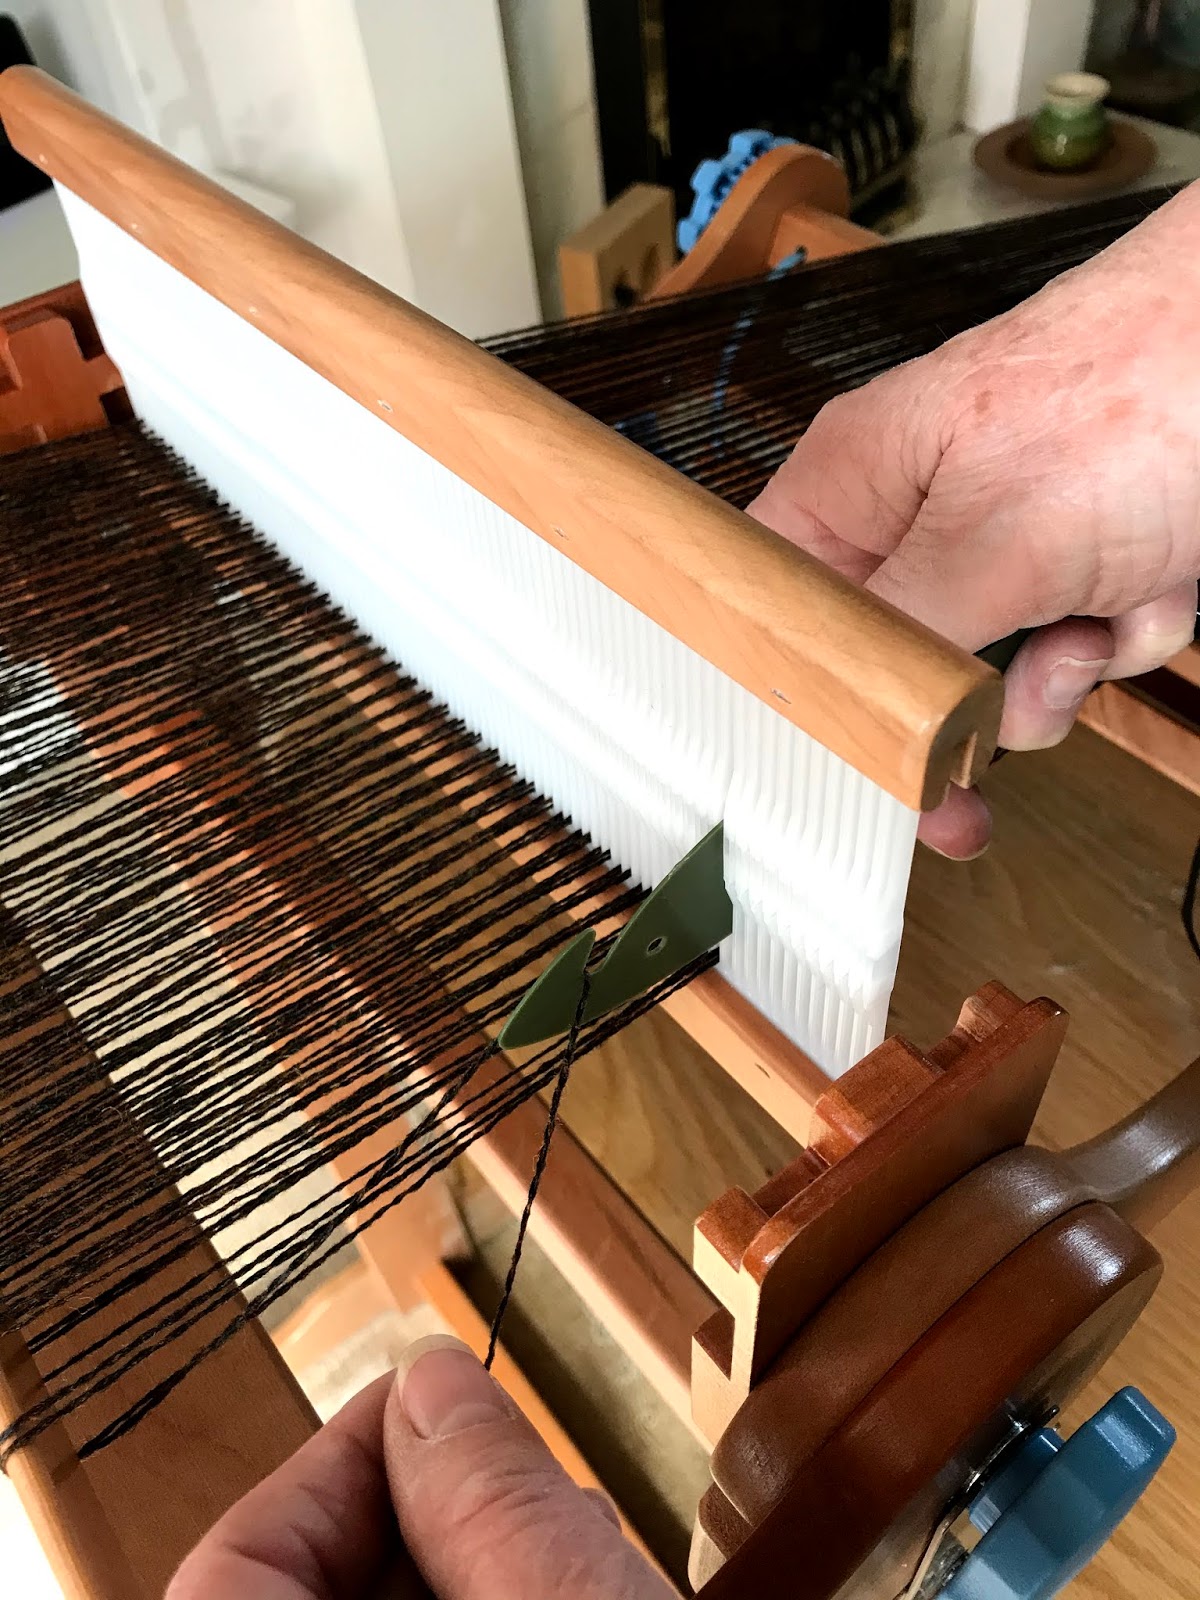
First and foremost the tying-on of your warp ends at the every edges, as we saw in Part 3, should help by ensuring that the start of the weaving is the right width to start.   The next thing is to ensure your weft is long enough to "mould" round the warp ends.  To do this lay your weft pick at 45 degrees.
Weft pick laid at 45degrees
In doing this you will find that there is enough additional weft to mould round the warp ends.  You can test this by holding the weft at the selvedge and bring it back to the fell of the cloth.  There will be about 1.5cm to 2.5cm (1/2" to 1") of weft to spare at the selvedge.  This would be how much the edges would pull in over the whole width of the weft.

The amount of weft to spare to mould round the warp ends, to prevent pull-in.
Very often there are loops at the selvedge, especially on a rigid heddle loom.  This is caused by the edge warps being at different heights as the weft turns round the selvedge.  To overcome this, hold the two adjacent warp ends at the selvedge at the same level, and at the same time give the weft a little tug to ensure it's sitting snuggly against the very edge warp end without pulling in.

Holding the two adjacent warp ends at the same level.
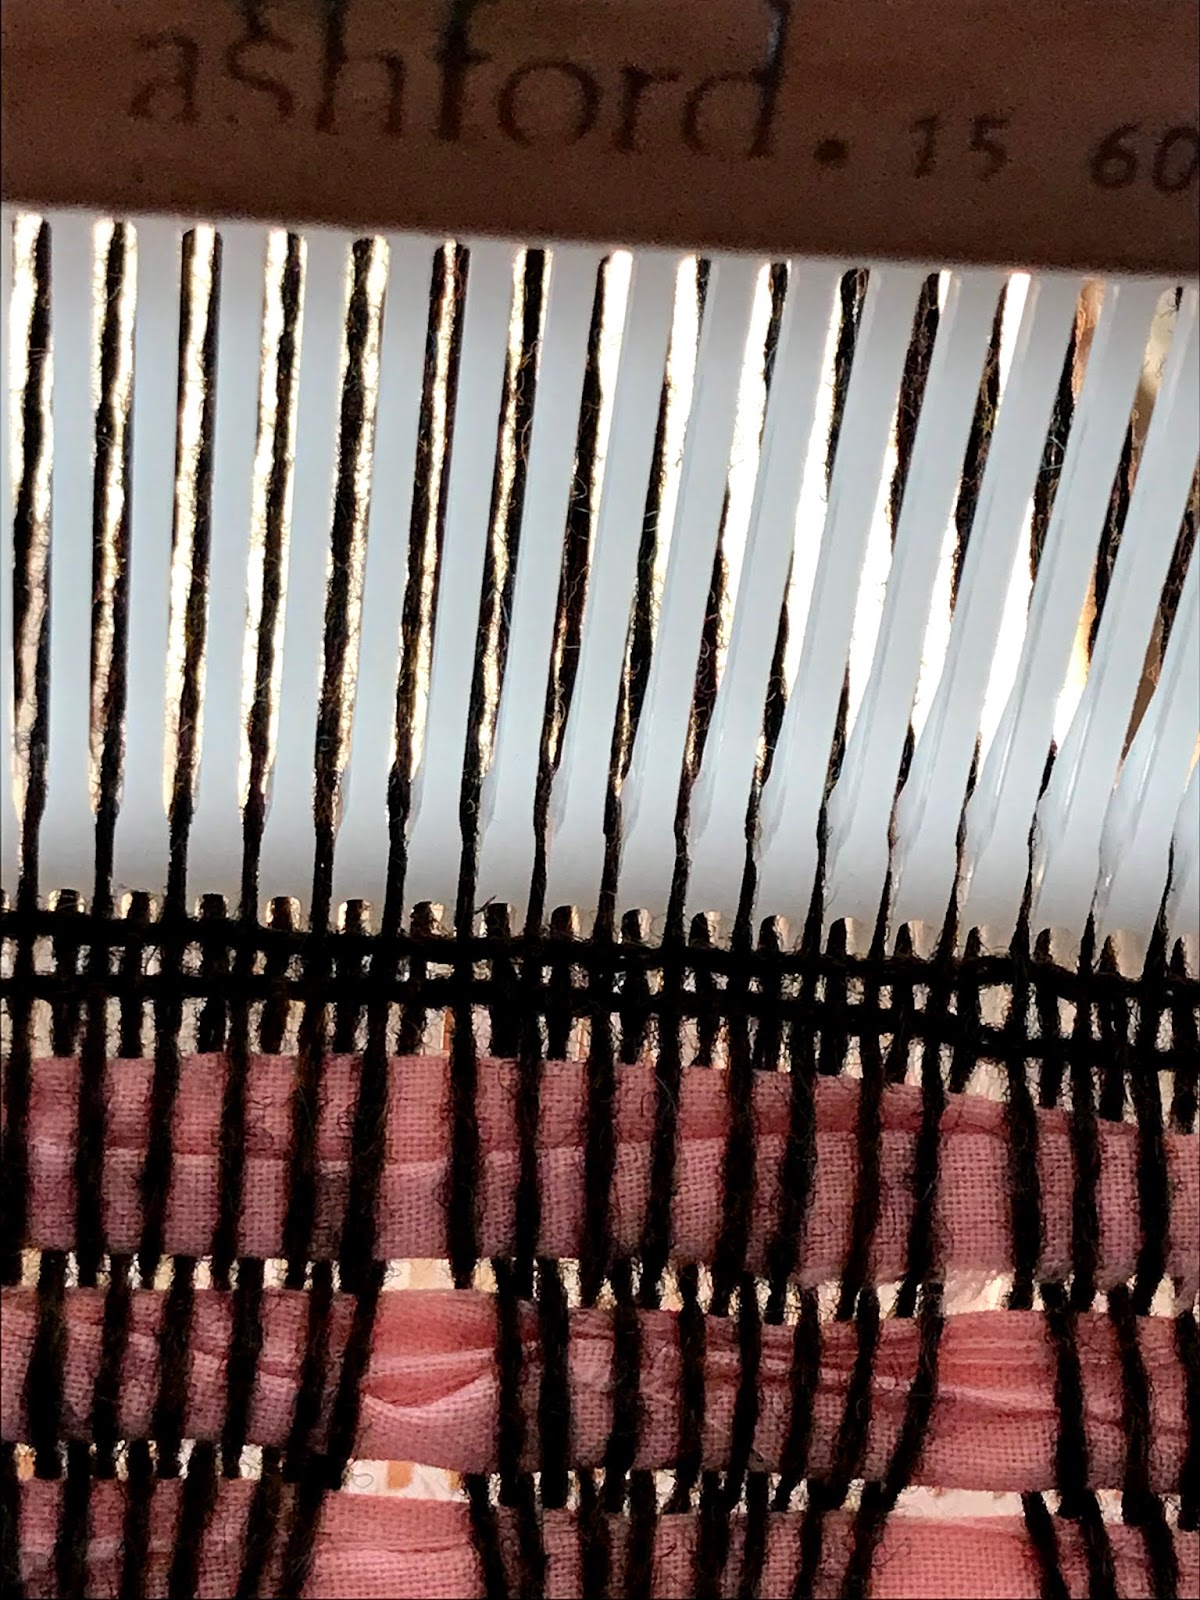
Once you've laid your weft at a 45 degree angle, gently ease the rigid heddle forward and watch the weft even itself out across the width of the warp.  You will see that it doesn't loop at the edge, but mould round the warp ends.  It's magic!

Watch the weft even itself across the warp as you gently ease it into position.
Although we say "beat" the weft into position, what we really mean is ease it into place.  You only need to "beat" the weft if you are making a rug and you need the warp ends to be covered completely to produce a weft faced weave.  For a balanced weave there should be equal warp ends and weft picks.  Two warps and two wefts should form a nice square when the weft is eased into position.  If you form a vertical oblong, you aren't beating enough, if it's an horizontal oblong your beating to much!
Two warps and two wefts should form a nice square.

Monday, April 06, 2020

Warping Your Rigid Heddle Loom - Part 3

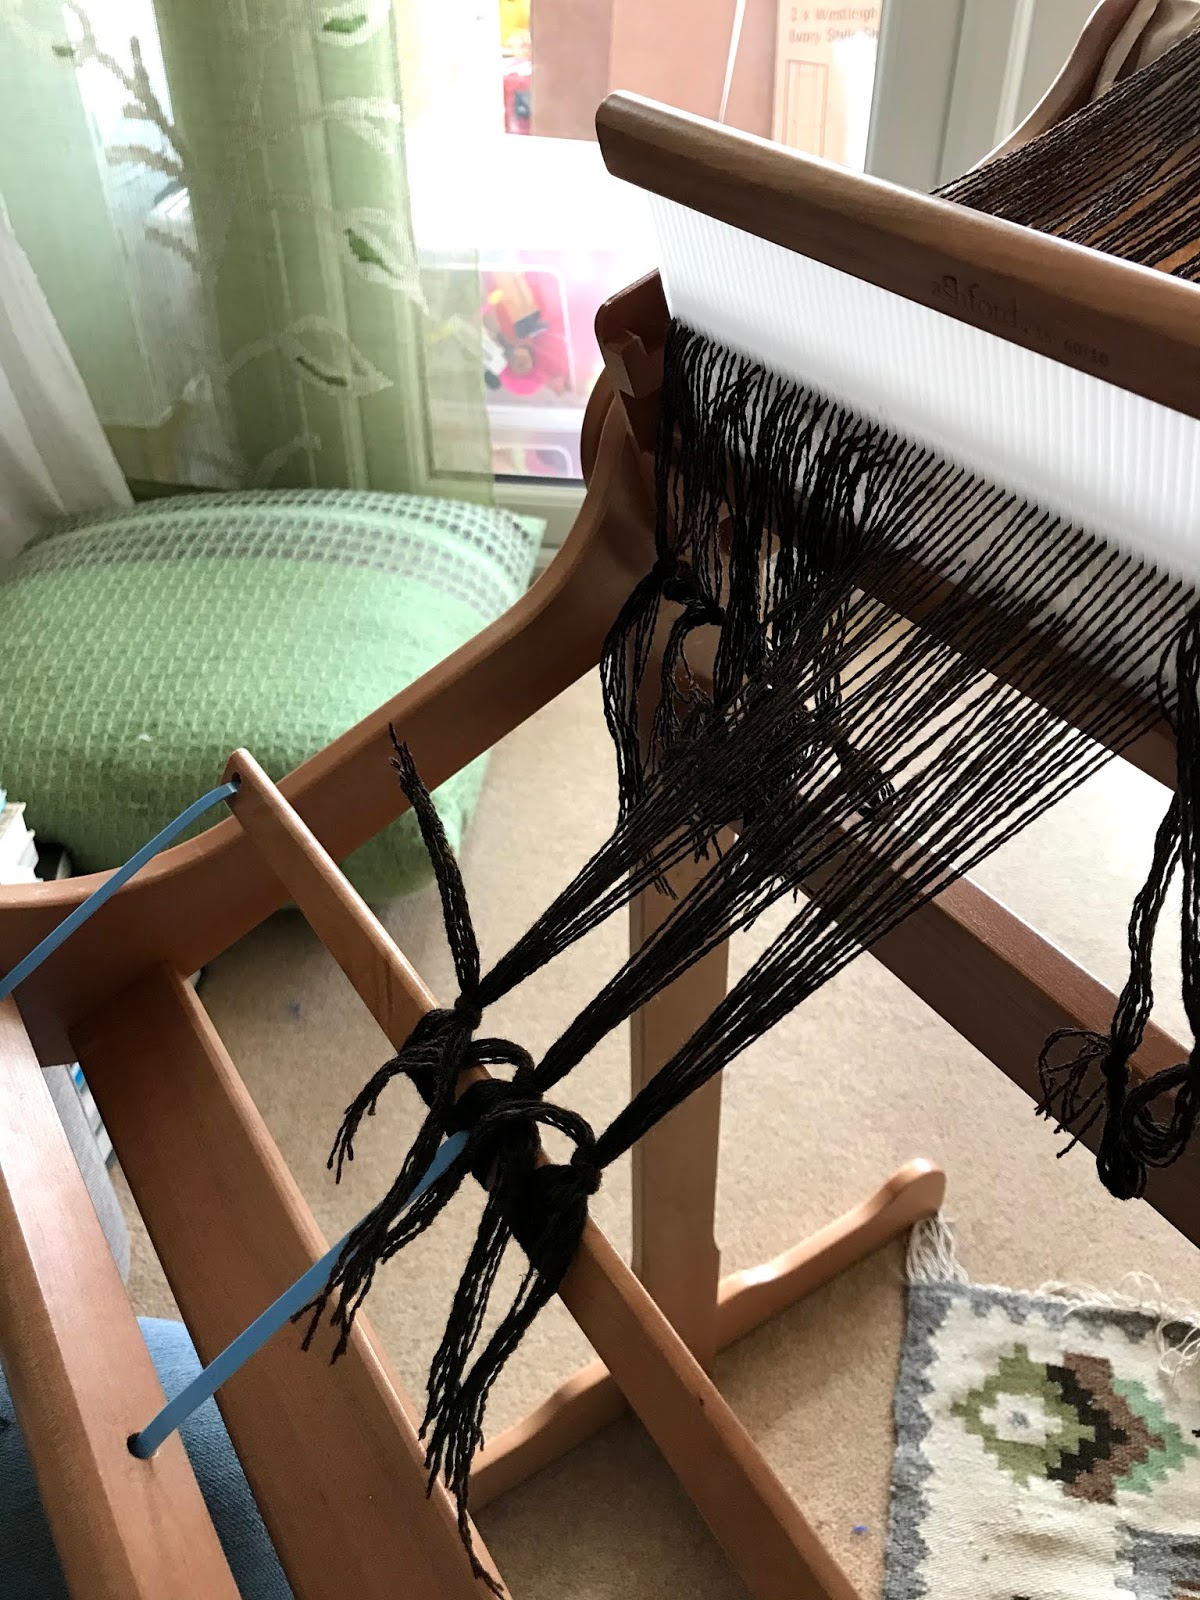
Back at your loom, you now should have threaded the holes in your rigid heddle and be ready to tie-on.

If you have an Ashford folding rigid heddle loom, the Knitters loom, you should ensure that the back is now lifted and the knobs tightened, if you haven’t done already.


There is more than one way to tie-on, but this is the way I was taught way back in the late 60's and although I have tried a number of different ways, this is the one I always come back to for a number of reasons which I will go into later.

I always start at the centre of my rigid heddle when selection bundles of warp ends and work my way out to the sides alternating bundles from the right and the left.

Take a bundle of ends from the centre and divide into two.  Bring the two halves either side of the centre apron tie and under the stick.  If you don't have a centre apron tie, just bring the two halves under the apron stick.  I usually work in bundles of eight, divided into two halves with four ends in each half is I've a fairly fine yarn.

Bring each half up over the top of the stick and down either side of the bundles.

Now cross the two halves at the back of the bundle and bring back to the front.

You can now tie the two halves together on top of this bundle.  Take the next bundle to the right and repeat the process.


Continue, by taking the next bundle from the left of the centre bundle and repeat.

Keep going in this way, taking bundles from the right and left alternately until you get the end right edge.

So far your bundles have been tied so that the knot is at the centre of the bundle.  But if you do this at the edge you will find that the rigid heddle will rub and shred the warp ends in the selvedge.  Also, as the knot will bring the bundle in and away from he true width of the weaving you will be fighting a battle to get the selvedge out perpendicular to the end warp in the rigid heddle.

To over come both of these problems tie your knot so that it is perpendicular to the end warp.

There will be a wider gap between the bundles, but that will be sorted when you pack your warp.
Repeat this at the left side.

Now for the packing.  Again, there is more than one way to do this and I've explored a number of ways to do this and depending on my warp, it's sett and how much yarn I have to spare I do it in different ways.  In general, this is the way I pack my warps.

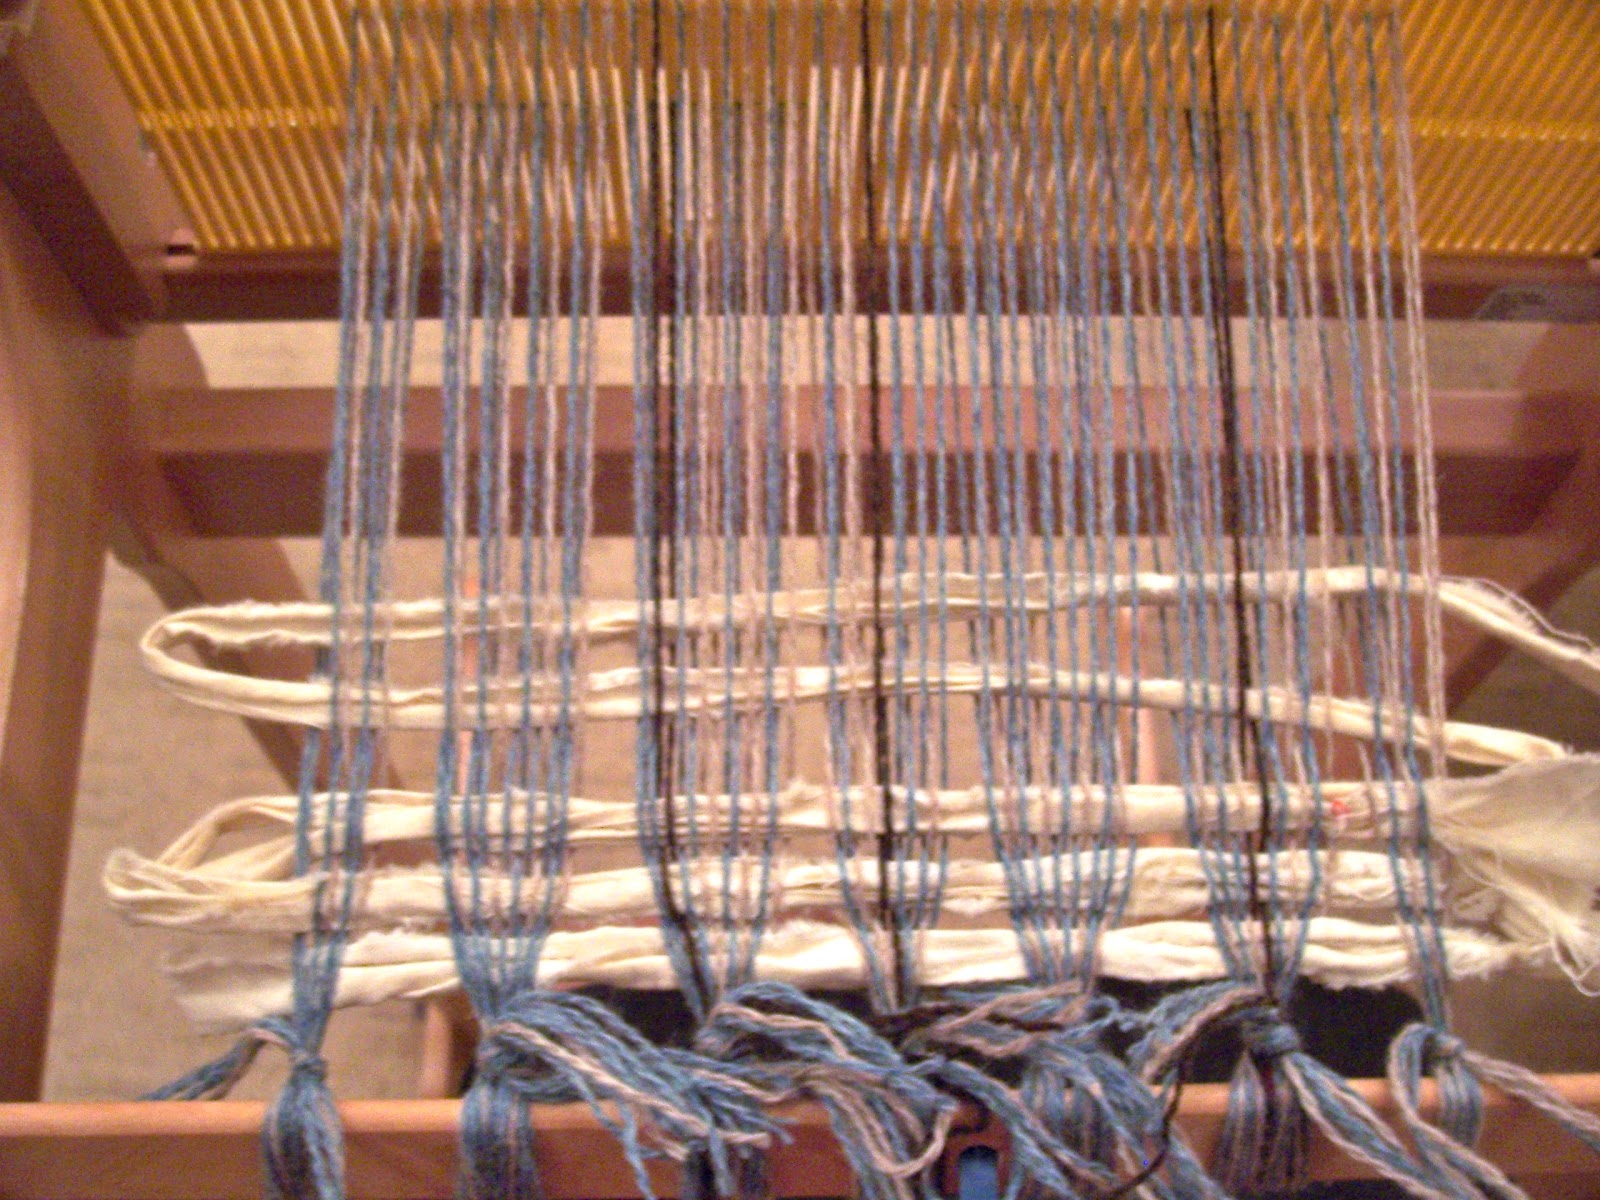
Take thick bundle of waste yarn or in this case a length of cotton fabric, cut into strips, measure a loop of fabric, wider than the width of your warp, open your shed and push the loop through with a stick shuttle.

Beat into place, then change your shed and repeat.

Usually three or four loops is all that is required.

Why do I use these loops?  Well, once the weaving is finished, the loom state fabric cut off and wet finished, it's really easy to pull out the loops from one side rather than having to unweave the bundles.

Next time I will show you how the weave ensuring you don't pull in the sides of the fabric.

Sunday, March 29, 2020

Warping Your Rigid Heddle Loom - Part 2

So you've managed to get back to your loom and, no warps have come adrift as you secured them all and you are ready to thread the holes.

Take your first bundle of loops, undo the slip knot and cut the loops.
Cutting the loops.
Starting from the right, leave the first pair of warps, in the first slot, where they are (this will be your selvedge) and select the second pair in the second slot.
Select your next pair of warps in a slot.
Separate them and remove one of the pair.   With your threading hook, pull this thread through the hole to the right of the slot.
Threading hook inserted in the hole to the right of the slot.

A note on threading the holes:
It's really important that this is done right, otherwise you can shred your warp ends making the weaving at the beginning very difficult.

Taking the next thread to be threaded in a hole and hold it in front of the rigid heddle.
Holding the next thread to be threaded in the hole.
Keep hold of the thread at that point, move your hand to the back of the rigid heddle and hook the warp end between your fingers and thumb.
Hooking the warp between your fingers and thumb.
Pull the warp through the hole until there is a loop at the front.
The loop of the warp end at the front of the rigid heddle.
Remove the hook and with our fingers pull the loop completely through the hole.

Repeat the threading through holes for the first bundle of warp ends and re-tie with a slip knot.  This will prevent them falling out of the rigid heddle if you have to leave your loom.  Repeat this across the rigid heddle until you get to the last pair of warp ends.  Thread these both through the hole to the right to form the left selvedge.

You can stop at this point, but check all the bundles are re-tied with slip knots.


Tuesday, March 24, 2020

Warping your Rigid Heddle - Loom Part 1


 A quick post to help in warping your rigid heddle loom.

Clamp the back of your loom to your table and clamp your warping post at the other end of the table.

To make sure your warp will be long enough measure from the back warp stick to the post.  This distance should be:

  •  the length of your project 
  • + shrinkage (shrinkage is often estimated at about 10%, but ideally you should have woven a swatch, measured the length and width once off the loom, wet finished and remeasured.  This will give you the actual amount of shrinkage.
  • + wastage (wastage is the amount of yarn between the back warp stick and where you estimate the fell of the cloth would be in front of your heddle and the amount of yarn between the start of your weaving and the end of the warp that has been tied to the front apron).  As a rule of thumb 18" or 45cm is about the amount of shrinkage with a rigid heddle loom.
Now you're set up you need to tie your warp yarn to the back stick and using your "fish" hook pull a loop through the fist slot.  This loop is taken round the warping post .

Pulling a loop of warp yarn through a slot with a "fish hook".


Taking the loop round the warping post.
Repeat this through all your slots until you get to the last one and cut your warp off and tie onto the back warp stick.
The warp is threaded across this loom and tied to the back stick.
Now you are ready to wind your warp onto your back beam.  But first you need something to separate your warp as they wind round your back beam.  When I learnt to weave at school back in the late 60's it was always sticks, but can be strong brown paper, my preferred choice, stiff cardboard stick or similar.  Never use newspaper, though, as it's not strong enough. 
Here are a few examples of suitable recycled packaging that I use.
Cut your chosen material to the the width of your loom, 12" in this case, and stick to the back beam with Sellotape.
My warp separating material taped to the back beam.
Remove the warp from the post and work your hands up towards the rigid heddle and stand on the side of the loom with the ratchet.  With one hand on the ratchet and the other tensioning the warp begin to turn the ratchet so that the warp winds onto the back beam.
The warp is kept under tension as you wind on .
Keep winding the warp onto the back beam, inserting stiff paper until you warp end is level with the front cloth beam.
Stop winding once your end is level with the cloth beam.

This often a good place to stop if you are short of time, but its really important to secure your warps in the rigid heddle if you are going to leave warping at this point.
Secure your warp in bunches with a slip knot.
Divide the warp into bundles and use a slip knot to keep them from slipping out of the slots.

As this is a good place to pause your warping, this is where we will stop.  So until next time enjoy warping.

See you soon, Alison.


Sunday, April 21, 2013

Students Work

I started teaching a new evening class last November and a number of my students learnt to weave with riged heddle looms.  This afternoon I had an email from one of them with an image if three lovely cushion covers she has woven.  She said, "I used my own textured hand spun, my Mum's left over scraps of plied home spun and some strands of colinette yarns. So 'dry clean only' . . . "

I'm sure you will agree how lovely they all are.
Three beautiful cushions designed and handwoven by Tyra Till


Saturday, March 03, 2012

Tip of the Month - March

This month I want to help you keep your selvedges nice and neat and prevent them pulling in.

First of all, after throwing your shuttle, ensure that the weft goes round the edge warp neatly.  Pinch the warp and weft together and gently pull the weft into a 45degree angle.
 The 45degree angle allows a little extra weft which will be able to mould round the warps when it is gently beaten down to it's horizontal position.


If the weft is taken straight across the warps there is no extra weft to mould round the warps, resulting in the edge wefts being pulled in.


To test how much pull-in there will be, hold the weft at the edge of the selvedge and pull up into the 45 degree position and you will find out how many  warp ends will be squeezed over both edges.

Being vigilant over this will ensure nice neat, even selvedges that don't pull in.


Saturday, December 17, 2011

Tip of the month - December 2011

I've been teaching quite a few rigid heddle workshops and courses recently,  mostly to new weavers, so I wanted to start a "tips" section on this blog in the hope it will be useful to all weavers, not just "newbies".
This month I had some lovely new people who had purchased new rigid heddle looms, could warp with the quick warping method and were getting along just fine.   One thing I did notice, though, was how they pack the warp at the beginning!  Some of the manufacturers suggest packing with card!  Such a lot of precious warp is wasted with this method, so I've been showing my students how to pack the start of the warp, to get the gaps filled quickly.
There are two types of packing I use, one is old thrums (the ends (threads) that's left at the end of a warp) which is something new weavers seldom have, and the other is long strips of fabric.
Even with a small square or rectangle of fabric you can cut long strips.
Take your fabric and cut 1" strips across the width, but not quite all the way across (see the image on the left).  This will give you a long strip which you can then use as your packing.

Fold the beginning of your strip so that it's just wider than your warp width and place in the shed.  Change your shed and from the same side of the warp, fold another section of your strip of fabric and place in this shed.
Beat each section of packing as you go and continue to add the packing until you find that the gaps between the bundles of warp ends are closed.


You will find with this method that the gaps close fairly quickly and that you waste much less warp.


Another nice thing is that the packing can remain in the warp until the cloth is finished and when you want to remove if, all you need to do is pull the first  the first piece of the strip and it all unravels nicely!

Thursday, May 06, 2010

Sustainability

I've just finished quite a busy few weeks looking at sustainability.

It began with the Rebecca Early lecture and workshop at Nottingham Trent University.  Becky has been doing a lot of research into sustainability and with a group of lecturers at the Chelsea College of Art and Design set up TEDResearch.  Please take a look at Rebecca's website and at the TED website which has some interesting and very useful resources and while you're there don't forget to sign up for their newsletter!

Last week saw me at NTU again, for the Private view of Akihiko Izukura's exhibtion, Life in Colours.  Running alongside the exhibition has been a set of four workshops which explore Mr Izukura's philosophy of natural textiles, Spinning, Reeling, Dyeing and Weaving and Braiding.

The exhibition is a revelation and a profusion of colour!  Who said natural dyeing was boring!   If you've in the Nottingham area is really is worth tracking down the exhibition at NTU's Bonington Gallery, your won't be disappointed unless you hate colour!  If weaving is your thing, you won't help being amazed at the skill of his weaving of traditional sashes, Obi, or his skill in braiding which is manipulated to fit the body.

The morning following the Private View I attended a Spinning workshop with Mr Izukura.  It wasn't what I'd call spinning, but was very interesting, never the less.  We had six silk worm cocoons that had been de-gummed and which contained two silk worms.  These "double" cocoons are not good for reeling as the two silk worms in the one cocoon cause the silk filament to tangle.  We pulled the softened cocoons into rectangles then moulded them over balloons and plastic to form 3D shapes, which were then painted with rice paste to stiffen then when the paste dried.

The afternoon was followed with the Natural Dye workshop, which for me was so wonderfully refreshing and completely different to any natural dyeing that I do.  I chose to dye a silk scarf which had been woven in Mr Izukura's factory in Kyoto, Japan.  The warp was spun silk and the weft was noil silk and took the dyes beautifully.  

I wetted my scarf, pleated it diagonally, forming a small triangle which I then pleated across the triangle and tied with two elastic bands.  I dipped one end in logwood, the other in cochineal, the top of the centre in walnut and the bottom centre in clove.

To fix the dyes I dipped the whole scarf in Camillia Ash water, then dipped the ends in fermented iron water.  This picture really doesn't do the colours justice.  What was amazing in this workshop was that we didn't use any heat and the dipped very quickly!

I was back again this week for a Reeling Workshop, where we reeled six cocoons into 3D shapes over balloons and plastic cylinders.  Very similar to the Spinning workshop, but using the filament silk rather than the noil.   We spent the afternoon weaving and braiding naturally dyed paper yarn into an interesting "neck piece".

My whole practice has been questioned by these events, how can I make my practice more sustainable and how do I take on board Mr Izukura's philosophy, putting nature before ego and practice!

So much food for thought.
Related Posts Plugin for WordPress, Blogger...