A quick post to help in warping your rigid heddle loom.
Clamp the back of your loom to your table and clamp your warping post at the other end of the table.
To make sure your warp will be long enough measure from the back warp stick to the post. This distance should be:
- the length of your project
- + shrinkage (shrinkage is often estimated at about 10%, but ideally you should have woven a swatch, measured the length and width once off the loom, wet finished and remeasured. This will give you the actual amount of shrinkage.
- + wastage (wastage is the amount of yarn between the back warp stick and where you estimate the fell of the cloth would be in front of your heddle and the amount of yarn between the start of your weaving and the end of the warp that has been tied to the front apron). As a rule of thumb 18" or 45cm is about the amount of shrinkage with a rigid heddle loom.
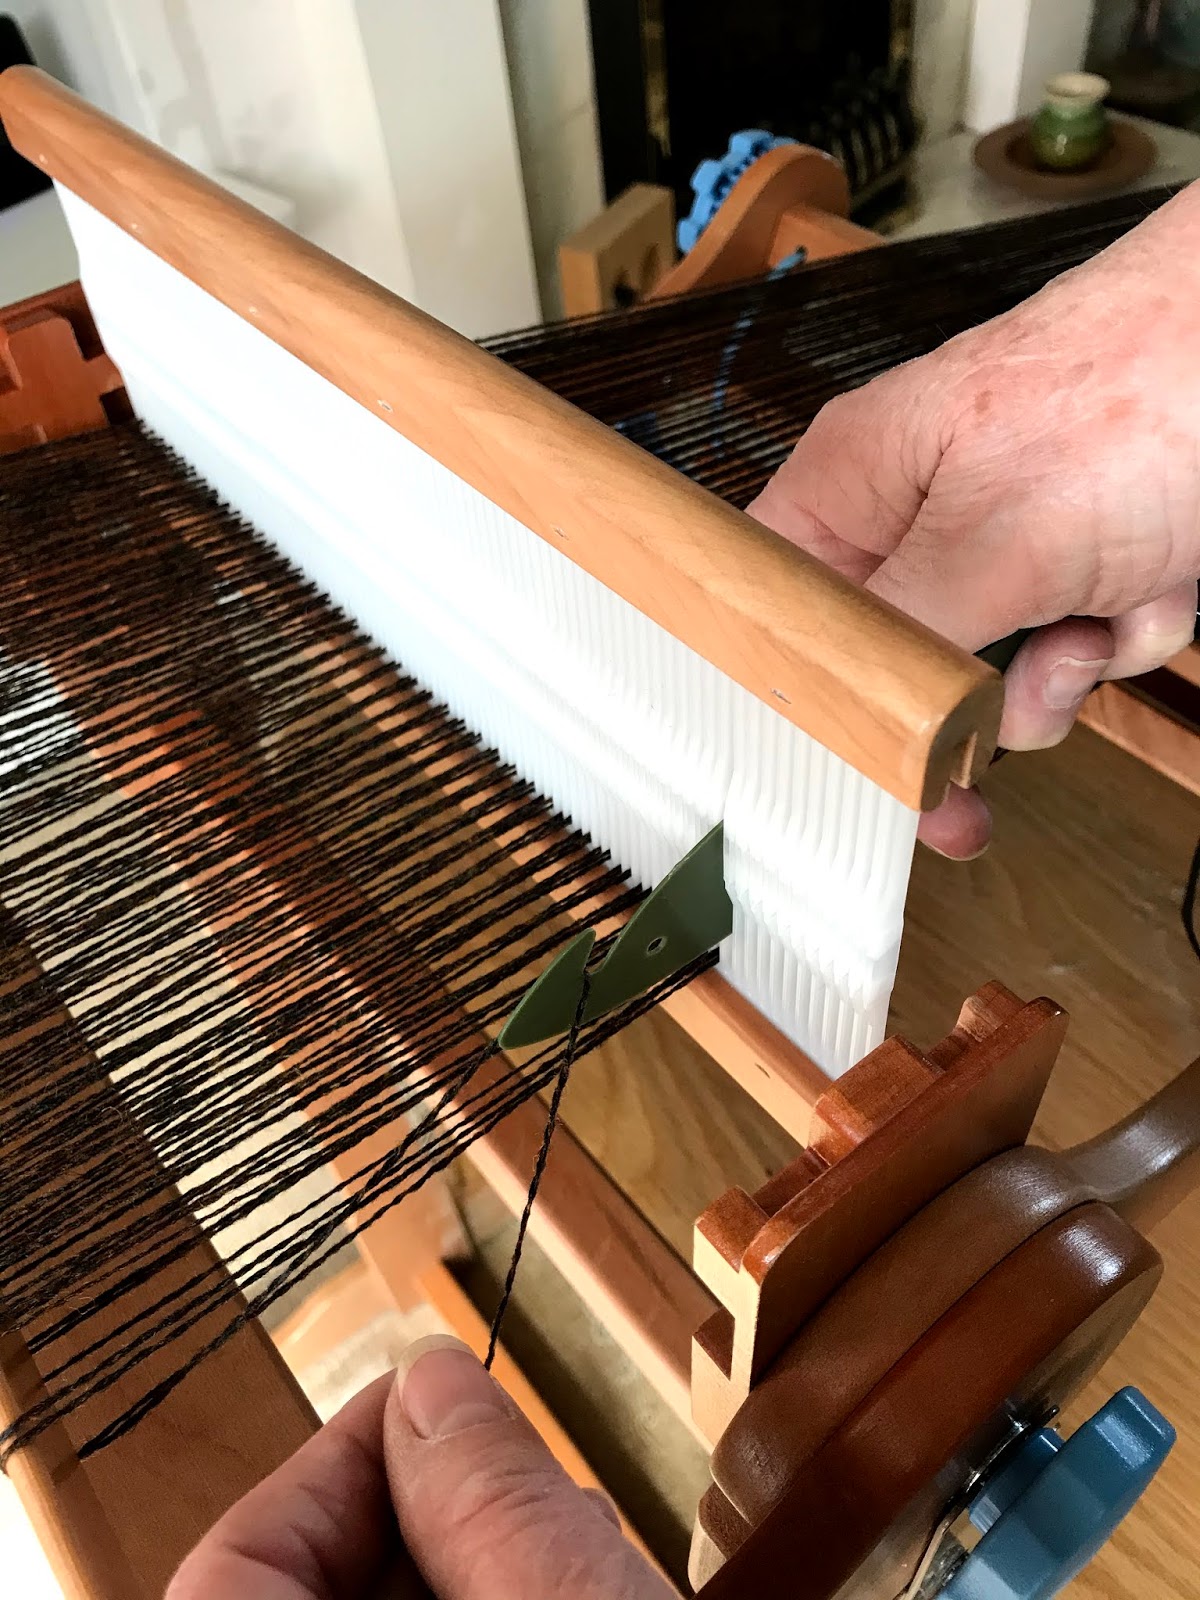
Now you're set up you need to tie your warp yarn to the back stick and using your "fish" hook pull a loop through the fist slot. This loop is taken round the warping post .
 |
| Pulling a loop of warp yarn through a slot with a "fish hook". |
 |
Taking the loop round the warping post.
|
Repeat this through all your slots until you get to the last one and cut your warp off and tie onto the back warp stick.
 |
| The warp is threaded across this loom and tied to the back stick. |
Now you are ready to wind your warp onto your back beam. But first you need something to separate your warp as they wind round your back beam. When I learnt to weave at school back in the late 60's it was always sticks, but can be strong brown paper, my preferred choice, stiff cardboard stick or similar.
Never use newspaper, though, as it's not strong enough.
 |
| Here are a few examples of suitable recycled packaging that I use. |
Cut your chosen material to the the width of your loom, 12" in this case, and stick to the back beam with Sellotape.
 |
| My warp separating material taped to the back beam. |
Remove the warp from the post and work your hands up towards the rigid heddle and stand on the side of the loom with the ratchet. With one hand on the ratchet and the other tensioning the warp begin to turn the ratchet so that the warp winds onto the back beam.
 |
The warp is kept under tension as you wind on .
|
Keep winding the warp onto the back beam, inserting stiff paper until you warp end is level with the front cloth beam.
 |
| Stop winding once your end is level with the cloth beam. |
This often a good place to stop if you are short of time, but its really important to secure your warps in the rigid heddle if you are going to leave warping at this point.
 |
| Secure your warp in bunches with a slip knot. |
Divide the warp into bundles and use a slip knot to keep them from slipping out of the slots.
As this is a good place to pause your warping, this is where we will stop. So until next time enjoy warping.
See you soon, Alison.