Showing posts with label woven fabrics. Show all posts

Sunday, November 01, 2020

New Directions - Part 1 - Design

Now I’ve not been teaching since lockdown in March, I’ve been in need of new inspiration, although I’ve suffered, like a lot of creative folk, from a lack of motivation.  On the last two Saturdays of October I was lucky to take part in a Laura Thomas workshop, Design for Weave, organised by the UK Complex Weavers group.  It should have taken place in March in London, but Covid-19 put pay to that, however, Laura and Complex Weavers re-organised it to be online instead.

Those who know me recognise my love of design and it’s great value in producing good quality and stunning textiles, so will wonder why I would need or want another Design Course...  ...I’ve been doing a lot of simple woven structures for quite a while  now,  most of my students had rigid heddle looms, so any inspiration for them had to be with one, too.  So Laura’s workshop is timely as I’m in great need of a kick up the proverbial back side to get me looking at 8 shaft structures.

Laura gave us a starting point and lead us through briefs, the design process and beyond via her new Weave School.  


I’d never thought of mind mapping as part of my design process, but I found it really useful and will certainly do it again.

What came out the this was looking at colour contrasts.


I always start my design process with writing, usually it’s a discussion with myself about my inspiration, describing the colours, shapes, textures, etc., in my inspiration.  This time, though, it was a lead in from my mind map and began to distill my thoughts about colour and how I could use them in my fabric ideas and taking them forward to a mood board.


Mood boards are one of my favourite things about design, they help to distill my ideas and are a great way to present the mind map in a textile form and if you work commercially they give the client an idea of your interpretation of their brief.  These are always ‘movable feasts’, you may discover something, during the design process, that you’d not initially thought about, or the client my prefer some alterations.


I’ll talk more about my design process resulting from Laura’s workshop and where it leads me in more posts, but for now there is a lot of food for thought here.

Monday, April 06, 2020

Warping Your Rigid Heddle Loom - Part 3

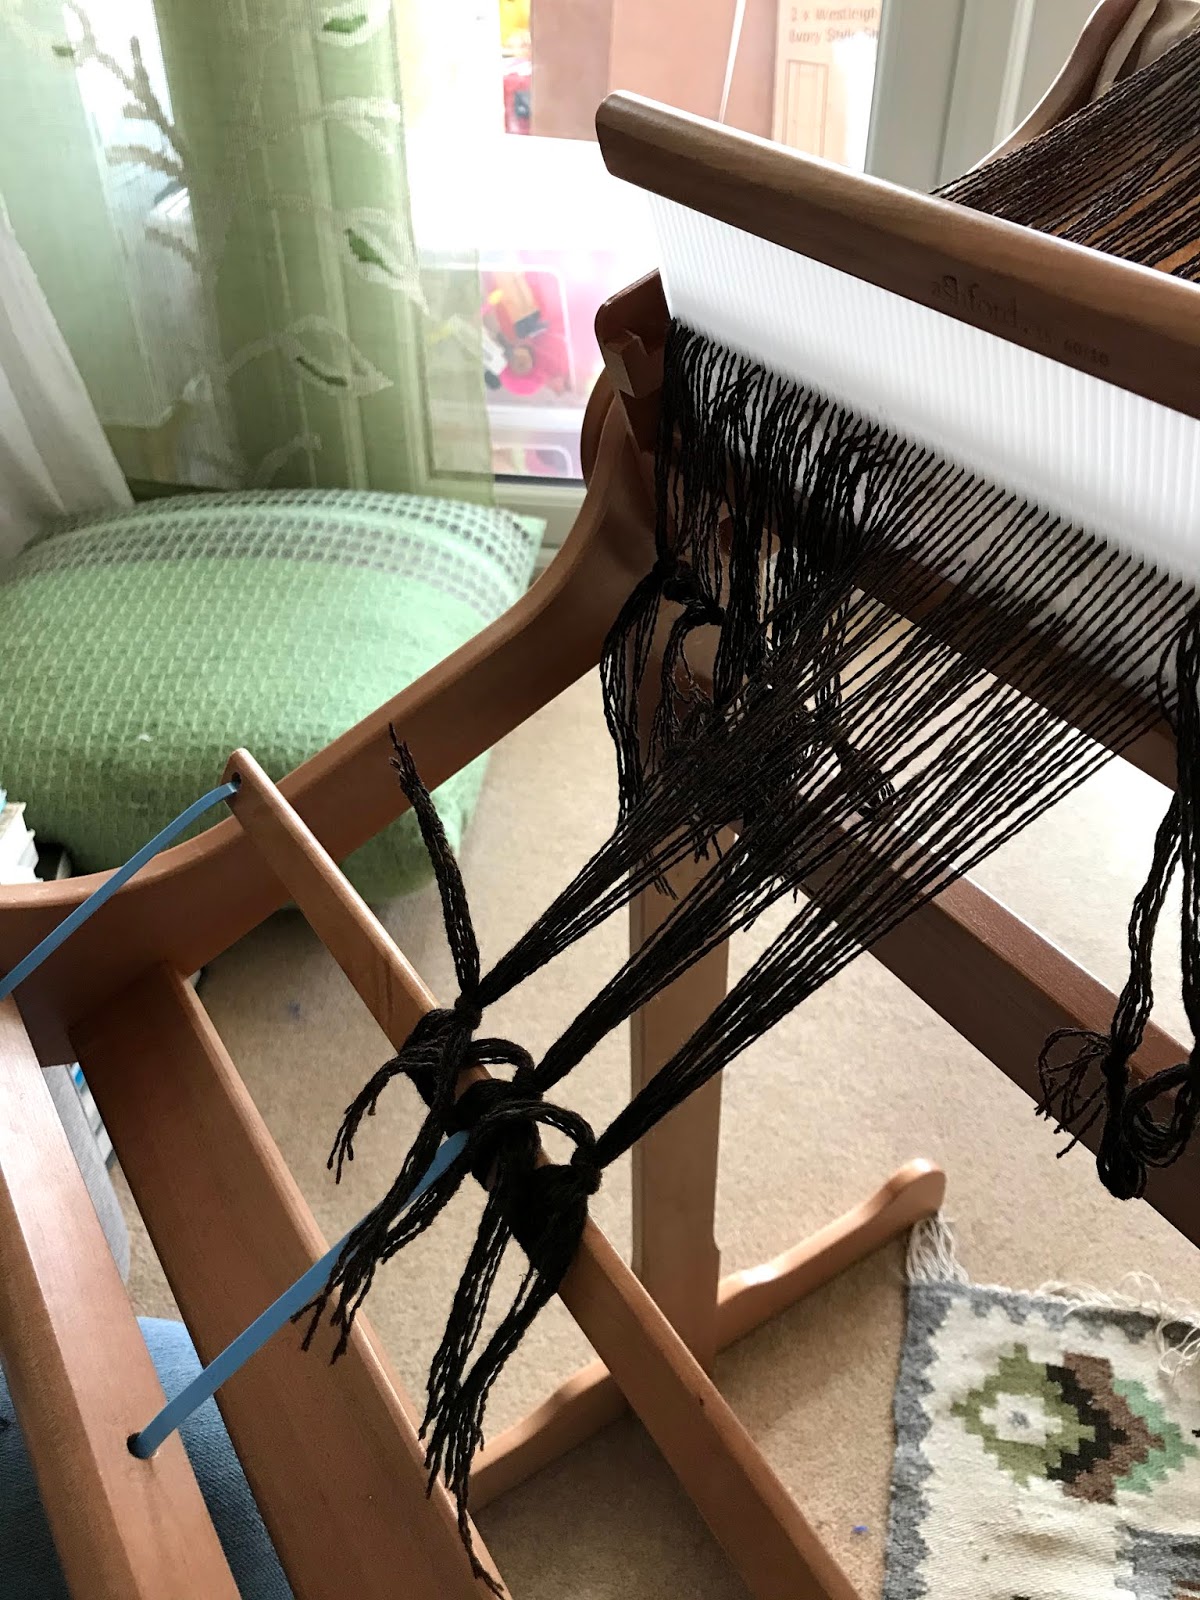
Back at your loom, you now should have threaded the holes in your rigid heddle and be ready to tie-on.

If you have an Ashford folding rigid heddle loom, the Knitters loom, you should ensure that the back is now lifted and the knobs tightened, if you haven’t done already.


There is more than one way to tie-on, but this is the way I was taught way back in the late 60's and although I have tried a number of different ways, this is the one I always come back to for a number of reasons which I will go into later.

I always start at the centre of my rigid heddle when selection bundles of warp ends and work my way out to the sides alternating bundles from the right and the left.

Take a bundle of ends from the centre and divide into two.  Bring the two halves either side of the centre apron tie and under the stick.  If you don't have a centre apron tie, just bring the two halves under the apron stick.  I usually work in bundles of eight, divided into two halves with four ends in each half is I've a fairly fine yarn.

Bring each half up over the top of the stick and down either side of the bundles.

Now cross the two halves at the back of the bundle and bring back to the front.

You can now tie the two halves together on top of this bundle.  Take the next bundle to the right and repeat the process.


Continue, by taking the next bundle from the left of the centre bundle and repeat.

Keep going in this way, taking bundles from the right and left alternately until you get the end right edge.

So far your bundles have been tied so that the knot is at the centre of the bundle.  But if you do this at the edge you will find that the rigid heddle will rub and shred the warp ends in the selvedge.  Also, as the knot will bring the bundle in and away from he true width of the weaving you will be fighting a battle to get the selvedge out perpendicular to the end warp in the rigid heddle.

To over come both of these problems tie your knot so that it is perpendicular to the end warp.

There will be a wider gap between the bundles, but that will be sorted when you pack your warp.
Repeat this at the left side.

Now for the packing.  Again, there is more than one way to do this and I've explored a number of ways to do this and depending on my warp, it's sett and how much yarn I have to spare I do it in different ways.  In general, this is the way I pack my warps.

Take thick bundle of waste yarn or in this case a length of cotton fabric, cut into strips, measure a loop of fabric, wider than the width of your warp, open your shed and push the loop through with a stick shuttle.

Beat into place, then change your shed and repeat.

Usually three or four loops is all that is required.

Why do I use these loops?  Well, once the weaving is finished, the loom state fabric cut off and wet finished, it's really easy to pull out the loops from one side rather than having to unweave the bundles.

Next time I will show you how the weave ensuring you don't pull in the sides of the fabric.

Sunday, April 21, 2013

Students Work

I started teaching a new evening class last November and a number of my students learnt to weave with riged heddle looms.  This afternoon I had an email from one of them with an image if three lovely cushion covers she has woven.  She said, "I used my own textured hand spun, my Mum's left over scraps of plied home spun and some strands of colinette yarns. So 'dry clean only' . . . "

I'm sure you will agree how lovely they all are.
Three beautiful cushions designed and handwoven by Tyra Till


Wednesday, September 29, 2010

100% Design 2010

Here are a few images of my stand at 100% Design 2010, held at Earls Court in London.


This images shows my chaise-longue, designed by Darren Kelly of Staffordshire University, a throw and bolster cushion.


This shows the close up of the detail on the back of the chaise-longue.


This is the shelving unit, Darren designed to take a woven panel of the same fabric as the throw.


Here is another view of the stand.  The colour on the walls is a better match in this image.


Here is the screen that Darren designed to take my woven panels.  I can remove the panels and replace with another design for other shows.
Related Posts Plugin for WordPress, Blogger...